


Dec 18,2020 by dollishreborndolls
How do we complete a reborn doll?
Part1 Supplies
1.Purchase a kit from a recommended reborn doll parts company.
This is the easiest way to complete your first doll. Once you get a feel for the colors and doll making you can experiment with your way of doll making. The kit should contain everything you need to complete the project such as paints, stuffing materials, body, doll limbs, mohair, and the tools to complete the doll.
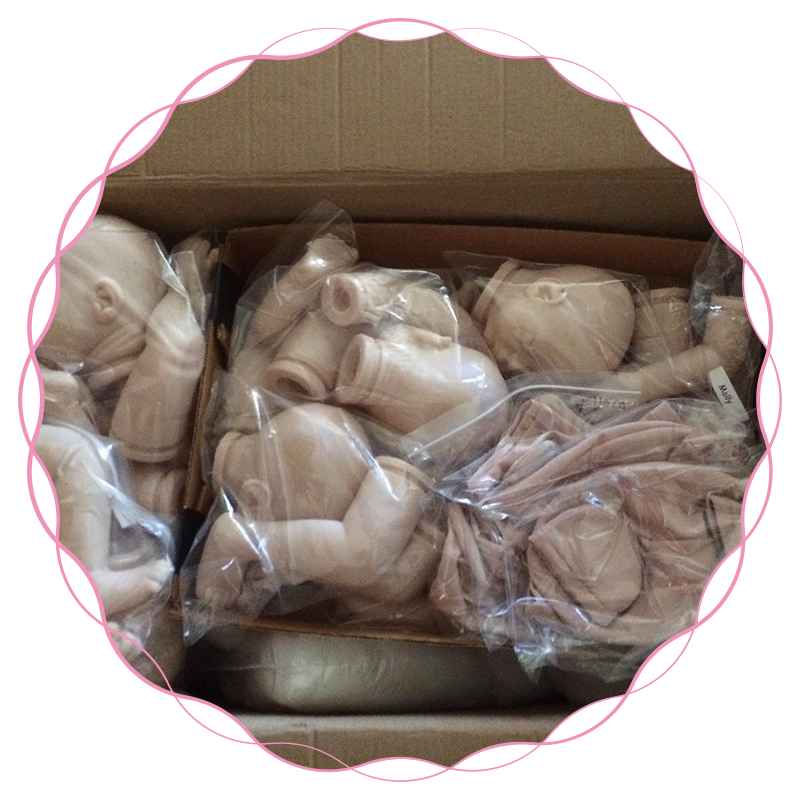
2.Purchase the doll parts to complete the project.
Most dolls will need a head, arms, legs, cloth body, hair. If you are reborn an open-eyed baby, you will need to purchase eyes and perhaps eyelashes, if you choose not to buy a doll making kit.
3.Purchase a rooting tool.
4.Purchase pantyhose (to fill with beads) and other fillers as required for the project.5.Purchase paint supplies.
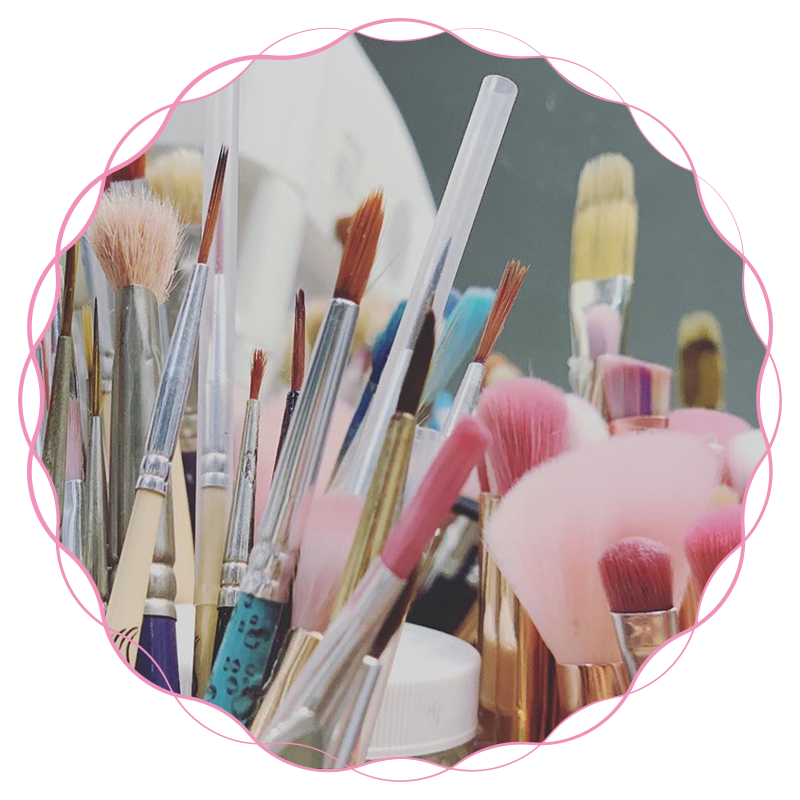
Most reborn artists use paints which will require the purchase of an oven, preferably a convection oven. You will need to purchase paints, paintbrushes, perhaps sea sponges or berry makers.
Many reborn artists use air-dry paints. If you choose to use air-dry paints, make sure to follow the directions, as there may be slight variations in technique depending on the paints.
Part2 Creating the Doll

1.Wash all the doll parts and let dry thoroughly. Try to find a dish detergent that works well to remove oils and to clean your doll. You can search online to find out what reborn artists recommend when it comes to selecting the best dish detergent to use.
2.Paint veins on the head and anywhere else you'd like veining.
Typical areas to find veining would be on the backs of the hands and the bottom of the feet. Look at photos of babies to get a good idea of where to place the veins. Use a very thin paint, almost like watercolor, to paint the veins. Light layers of paint are what is needed to paint a reborn doll.
3.Line a baking sheet or baking tray with a dish towel or tea towel. Place the doll parts onto the towel.
4.Bake the doll parts that have had veins applied. The temperature is usually between 260 to 265 °F (127 to 129 °C) for 8 minutes to set the paint.
5.Remove the doll parts and let cool.
6.Apply a thin wash of flesh tone colored paint in a pouncing motion using a mop brush or sponge, your choice, to the doll parts. Be sure to use a very thin, almost watercolor consistency paint, otherwise, your doll will end up looking chalky. Bake according to the previous directions. Let it cool.
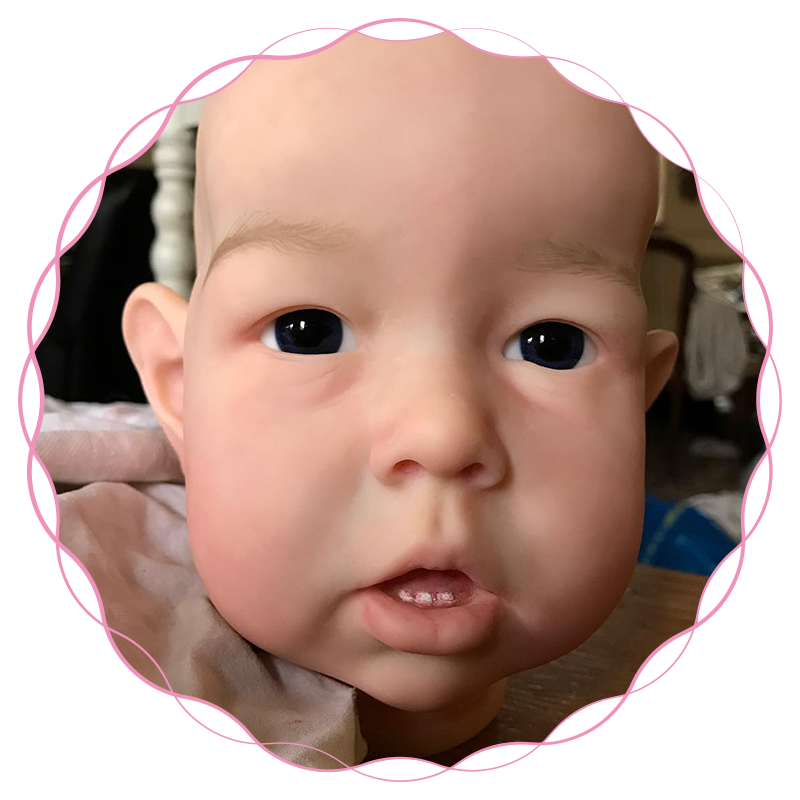
7.Reapply several thin layers of flesh tone and mottling layers of colored paint using a brush or sponge. Bake to set the paint.8.Apply a thin wash of blushing to create a newborn blotchy look.
Typical places to blush would include the bottoms of the feet (use a "U" motion to paint around the outer edges of the sole); in baby creases (do this delicately) and across the bridge of the nose and cheeks. Use a sea sponge or mop brush to pounce the paint. Bake to set paint using previous directions.
9.Paint the nails and lips. Use a filbert paintbrush to apply the paint.
Apply one layer of paint to the nails and several layers to the lips. Bake as directed above to set the paint.
10.Paint the eyelids with fine veining using a script liner brush.
Use a delicate hand, and thinned paint, to carefully paint veins on the eyelids. Use a purplish paint that looks much like Dioxide purple. Bake the doll parts as directed to set the paint.
11.Paint the eyebrows using a script liner brush and a delicate hand.
The paint should be very thin so the brows look delicate when painted onto the face. Bake the doll parts as directed to set the paint.
12.Apply the nail tips using a liner brush or toothpick.
Use a whitish paint and delicately apply a dab of paint following the curvature of the nail. Bake the doll parts as directed to set the paint.
Part3 Rooting the Hair and Eyelashes

1.Cut the mohair into manageable lengths, around 3 inches (7.6 cm).
2.Insert the hair into the scalp using the rooting tool and felt needles.
3.Glue the hair from inside the head cavity.
Add a good dollop of glue to the inside of the head cavity in the scalp area. You can search online to discover what reborn artists recommend for gluing hair. Use a hemostat or other long gripping tool and a sponge to smear the glue around. Let dry.
4.Root the eyelashes. The eyelashes are rooted the same way. Root the eyelashes in and then glue them from inside the doll head.
5.Trim the scalp hair as desired. Look at newborn babies to get a general idea of how to style the hair. Some artists use a razor comb to style the hair as this helps create a realistic hair cut.
6.Dampen the hair with water and place a cut off nylon, or nylon sock, on the head to hold the hair down. Let it dry.7.Style the hair as desired.
Part4 Assembling the Doll
1.Follow the kit directions or directions given for the purchased doll parts.
In general, line the body cavities with cut off pantyhose and fill with beads or other filler to weight the body and head. Secure the nylons and place them in appropriate doll cavities.
2.Assemble the doll parts following the kit or purchased body directions.
3.Diaper your doll, if appropriate.
4.Dress your doll in the desired outfit.
Tips:
Try searching online to find sellers of reborn doll parts and air-dry paints.
To help your paint last longer, seal your paint with a thinning medium. If you would like; you can mix in some Matte Varnish to give a nice matte finish.
Warnings:
Always use paint thinners and other potentially toxic products in a well-ventilated area.
Always use a separate oven to bake doll parts. Most reporters now use a convection oven, one that is not used for baking food, to bake doll parts.
Always bake the doll parts in a well-ventilated area.